Contents of this blog:
License Purchase
1. Find the xViz visual and view its associated plans in Microsoft AppSource
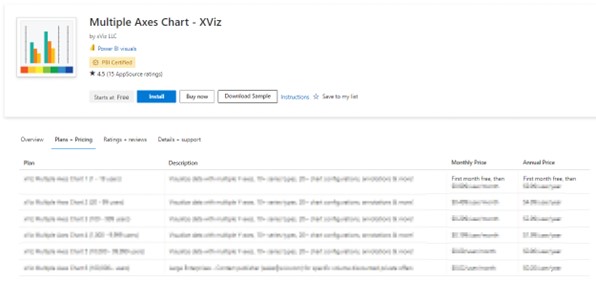
2. Click on ‘Buy Now’
3. Select the required Plan
4. Select price + billing options:
- Billing term: Monthly or yearly
- Recurring billing can be set to enable auto-renewal
- Provide the number of users*
*Users must include report creators/editors as well as viewers.
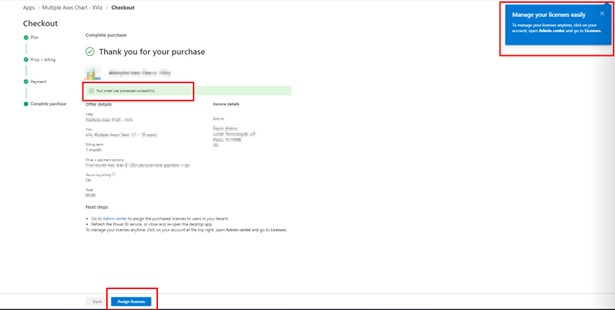
5. Provide the Payment Method and Place the order
6. Upon successful order completion, you will be given the link to Microsoft 365 Admin center to assign the purchased licenses:
License Assignment
7. After the purchase, the purchaser must assign the licenses to the users on the Microsoft Admin Portal.
Note: Even if you do not have admin rights in your tenant, you will still be able to access the portal to assign the purchases xViz licenses after the purchase from Microsoft AppSource.
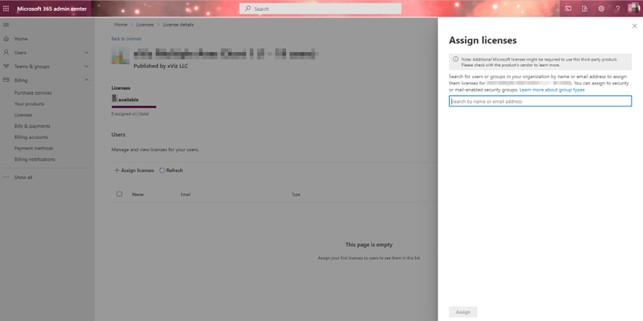
8. You can assign the license to the users directly by providing their individual emails, or through Microsoft Groups (Mail-enabled group or Security Group).
Managing the xViz license purchased from Microsoft AppSource
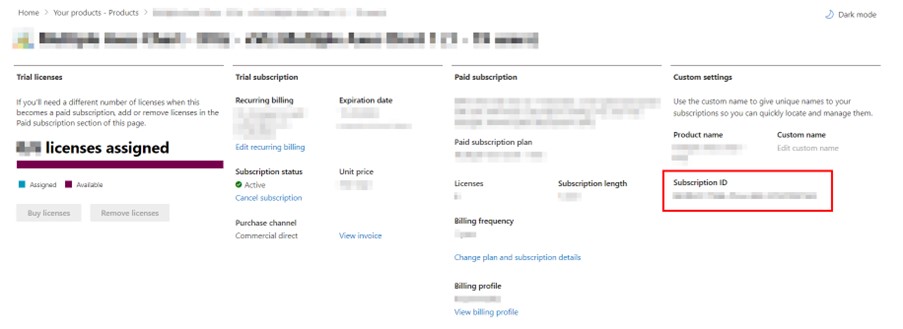
You can access the information about the license purchased by you and manage it in the Subscriptions - Microsoft 365 admin center. Every subscription is associated with a subscription Id which is essential for any support ticket that you raise:
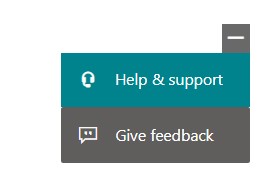
Need any help with the subscription? You can reach out to the Microsoft team using these options available in the Microsoft 365 Admin center – on the bottom right section of your screen
Questions? Refer to our the FAQs
Disclaimer: The snapshots provided above are as per the date on which this blog was drafted. The interface of the Microsoft 365 Admin center is subject to change by the Microsoft team.